Recent Entries
QuicksearchLinks |
RSS Feeds  
Stumbleupon This Site! 
 Save to del.icio.us Save to del.icio.us
CategoriesLinoleumError on line 141 of /var/www/iomem/bundled-libs/Onyx/RSS.php: The specified file could not be opened. (#404) |
Installing Debian Sarge with software RAID
Sunday, May 22. 2005
Partitioning

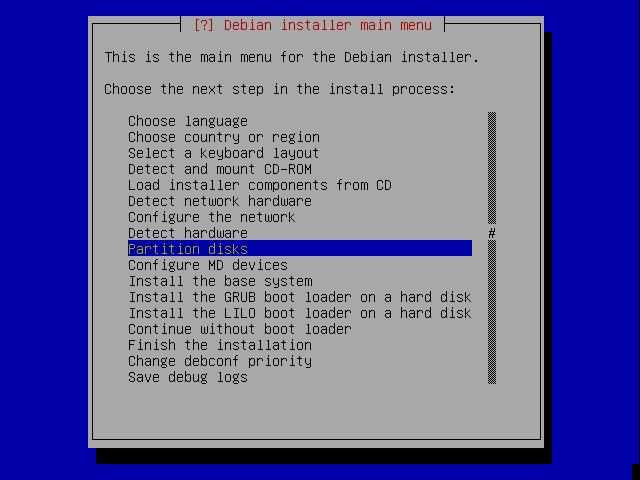
Now continue with the next few options, "Detect Network Hardware", "Configure the Network" and "Detect Hardware". These are all fairly straightforward. After completing these steps, select "Partition disks".
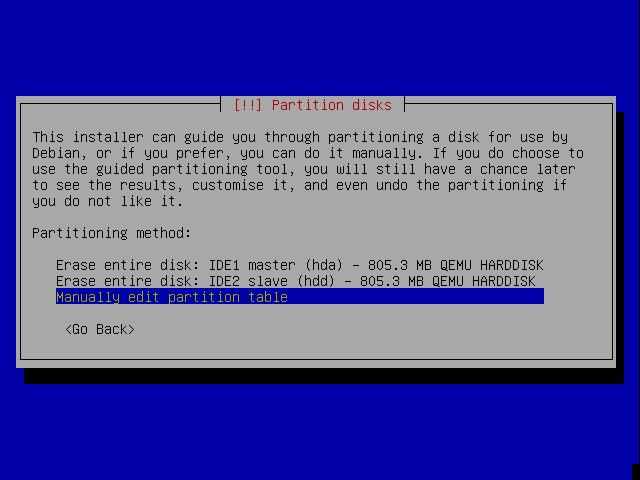
You're now running the partitioning program. If you've got existing partitions on the disks that you want to get rid of, it might be helpful to select the "Erase entire disk" options for each of them. Otherwise, select "Manually edit partition table".
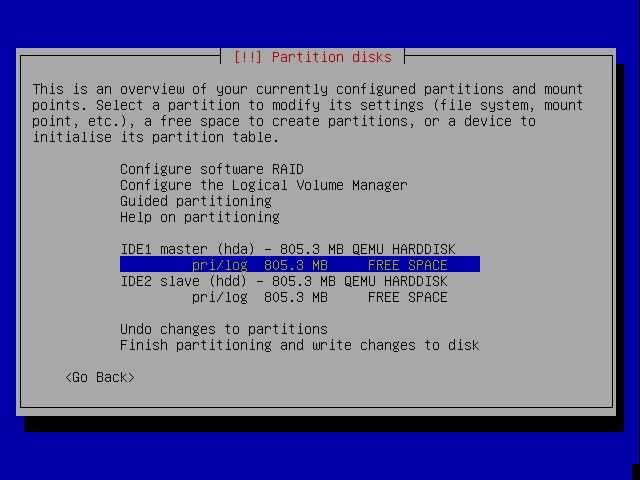
The steps that we are going to take here are:
Create identical RAID autodetection partitions on each disk
Create swap space on each disk
Create a mirrored RAID device
Put a filesystem on the RAID device
If we wanted to, we could even make a mirrored raid device of the two partitions that we're going to allocate for swap space. We won't, in this case, because I'm more interested in having a lot of swap space for testing purposes, rather than mirrored swap for reliability, but I would recommend it if you're creating a production system.
So firstly, cursor down to the "FREE SPACE" line for the first hard disk and select it.
Now select "Create a new partition":
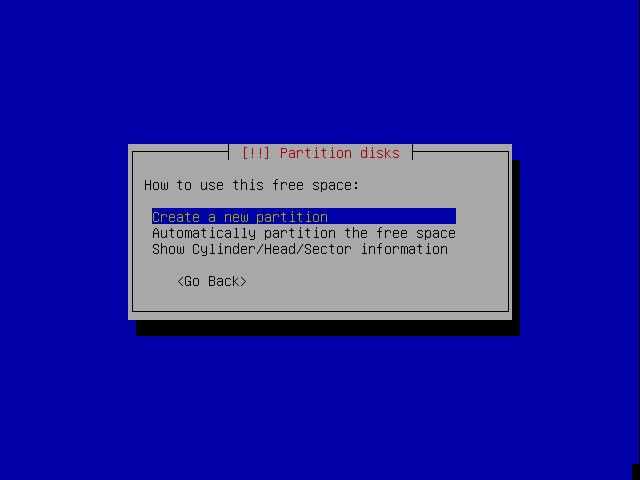
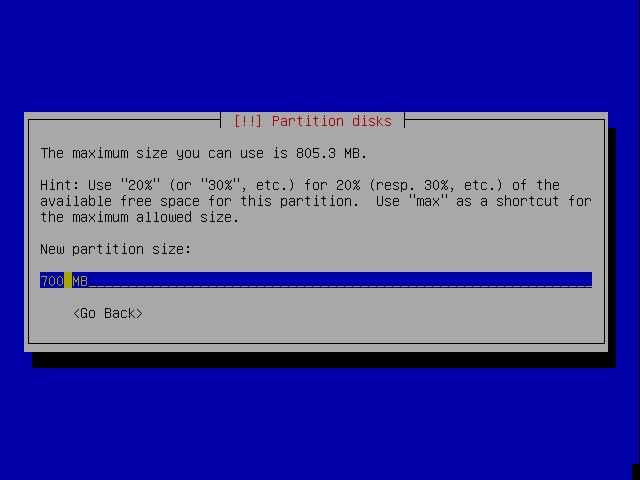
The disks that I have set up for my QEMU virtual machine are quite small; only 800Mb. For this reason, I'm putting everything in a single 700Mb partition, and allocating 100Mb for swap. If you're just learning to use the installer, it's probably worth doing the same, and just creating a single partition to install the whole system into, to save time. But if you're making a production system, it would be well worth creating separate filesystems for /, /var, and /home, at the minimum.
So now, enter the amount of space that you wish to create for this first partition.
If you found this article helpful, consider making a donation to offset the costs of running this server, to one of these addresses:
Trackbacks
Trackback specific URI for this entry
No Trackbacks